The mkiraf command initializes IRAF. The command works the same under either VMS or Unix. The mkiraf command does two things for you:
VMS:
$ CREATE/DIR [.IRAF]
$ SET DEFAULT [.IRAF]
$ IRAF
$ MKIRAF
Unix:
% mkdir iraf
% cd iraf
% setenv iraf /usr/stsci/iraf/

% source $iraf/unix/hlib/irafuser.csh
% mkiraf
After typing the mkiraf command, you will see the following:
% mkiraf
-- creating a new uparm directory
Terminal types: gterm=ttysw+graphics,vt640...
Enter terminal type:
Enter the type of terminal or workstation you will most often use with IRAF. Terminal types and workstation emulators will vary from site to site and you should look at the dev$termcap file for a complete list of terminal types.*1 There are literally dozens of terminal types to choose from, and a good match between your hardware and the termcap entry will allow IRAF to take full advantage of your terminal's graphics and text capabilities. However, the match need not be perfect for IRAF to function reasonably well (and you can always change it later). Three generic terminal types will work for most users:
After you enter your terminal type, you will see the following output before getting your regular prompt:
A new LOGIN.CL file has been created in the current ...
You may wish to review and edit this file to change ...
The login.cl file is the startup file used by the CL. It is similar to the LOGIN.COM file used by VMS or the .login file used by Unix. Whenever IRAF starts, it looks at the login.cl file. You can edit your copy of the file to customize your IRAF environment. In fact, you should look at it to make sure that everything in it is correct. In particular, there is a line starting with set home = that tells IRAF where to find your IRAF home directory. You should verify that this statement does, in fact, point to your IRAF directory. If you will be using IRAF format images, you should also check the setting of imdir, which is the directory on disk where IRAF will store your pixel files (more information on IRAF format images is provided in "IRAF Images" on page 38).
If you will be using IRAF networking to display images across the network, you should also check the setting of the node variable, which you would set to the name of your workstation, for example:
set node = "spudley.stsci.edu"The uparm directory will contain your own copies of IRAF task parameters. This allows you to further customize your IRAF environment by setting certain parameter values as defaults. Once you set up IRAF, you should rarely need to do it again (you might need to if a major revision is installed on your system).
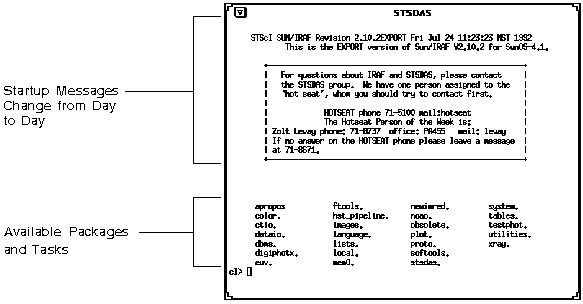
Now you are ready to use IRAF. To start IRAF's command language, type cl. IRAF starts by displaying several lines of introductory text and then puts a prompt at the bottom of the screen. Figure 1.1 is a sample IRAF startup screen.

Generated with WebMaker


